When you’re just getting started with breastfeeding, figuring out how to get a deep latch can feel miserable.
Especially when you’re exhausted, overwhelmed, and everything just seems to hurt.
You’re doing what you were told to do in the hospital, but no matter what you try, you keep ending up with a painful latch that you know isn’t right — but you have no idea what to do differently.
Here’s the good news.
There are things you can do differently — and easily — to help latching work for your body. In this blog, I’ll walk you through the latching approach I developed and use (and teach to professionals) to help families use their baby’s own innate reflexes to make the whole process feel better.
Click to see what’s in this blog and jump to a specific section. –
A good latch is one that feels comfortable for your body and allows your baby to feed effectively — removing milk efficiently, without pain, and settling into a natural rhythm of sucking and swallowing.
While the signs of a good latch during feeding are often the same — a wide-open mouth, plenty of breast or chest tissue inside, and steady, rhythmic swallows — the best way to get there can look very different for everybody.
There isn’t one universal “right” way to latch a baby. Your body is unique. Your baby’s body is unique. And what works for both of you together? That’s uniquely yours, too.
Some parents simply have a body-and-baby combination that makes latching easier than others.
A lot of parents worry they’ve somehow missed out on “instinct” — like if feeding doesn’t come naturally, they must be doing something wrong. But latching is not purely instinctive for you. It’s a skill, just like learning how to change a diaper or soothe a crying baby.
If it doesn’t click for you right away? That’s okay. Sometimes it takes repeating the same steps a few times, or trying a different approach, before you find what feels easier, more comfortable, and most importantly—sustainable—for both you and your baby.
And don’t let the words “good latch” or “bad latch” discourage you. How your baby latches isn’t a report card on your ability as a parent — it’s simply information about how well the process is working for you both, right now.
Want a visual latching guide to help?
I’ve put together a free Reflexive™ Latching step-by-step cheat sheet to help you remember the steps from this blog — and make feeding time easier.
Now that you know there isn’t one single right (or wrong) way to latch, let me share the approach I’ve developed and refined with families in my practice.
I call it the Reflexive™ Latch. I’ve seen it transform feeding — not because it’s magic, but because it works with how babies are already wired to feed. My goal is to help you understand how to use it too, step by step.
The Reflexive™ Latch has three phases that naturally flow together:
Phase 1: Positioning — getting your baby set up so they can open wide for a deeper, more effective latch.
Phase 2: Attaching (or Latching On) — supporting them as they begin to suck, swallow, and settle into feeding.
Phase 3: Getting Comfortable — making small adjustments once the latch is stable so feeding feels good for your body too.
Remember: this is just one way of approaching latching. It’s a framework you can lean on, but you may still need to adjust it to fit your body and your baby.
Phase One: Positioning for a Deep Latch
Before your baby can latch deeply, you’ve got to help them get their body lined up correctly. This isn’t about what position is “best” to use — though I find cross-cradle works best when you’re first learning this approach — but about how your baby’s mouth lines up with your nipple.
This part is key. And it’s where everything starts to either fall into place… or fall apart.
As you and your baby get more confident and practiced, it will become second nature, but in the beginning, it’s worth slowing down to make sure everything is lined up as well as possible.
Start Upright in the Cross-Cradle Position
Start by sitting upright. I know there is a lot of buzz about “laid back” or “upright” positions, and those are great — but not for learning what to do if things feel confusing.
Sit up in a chair (any chair will do) and start with a cross-cradle hold.
That means you will reach across your baby’s body with the arm opposite the breast or chest you’re feeding from.
Use that hand to support your baby behind the shoulders and base of the head — not the back of their actual head — so you can guide them gently and precisely.
You can slide your arm through their legs and up behind their shoulders
Or wrap your arm around their lower body and support them from the side
What matters is:
You can see your baby’s face
Your hand closest to your breast should support their head, not their body
This position gives you more control over timing when you’re learning exactly what to do… and timing is what makes the difference between a 0 and a 10 on the pain scale.
Use My ABCs of Positioning
A is for Arms Your baby’s arms should be hugging or wrapping around your body. This snuggles their upper body in close and keeps them aligned.
B is for Belly Button Their belly button should be rolled in toward your belly — not facing the ceiling. This keeps their whole body close and stable.
C is for Chin Their chin should be close to (or planted on) your breast or chest. That chin contact is what triggers your baby’s brain to open wide — which is exactly what we want before they start sucking.
Make Sure Your Nipple is Above Your Baby's Mouth
This might feel strange at first, but your nipple should not be centered with your baby’s mouth. Think nipple-to-nose. That way, their mouth opens before your nipple touches their lips. That’s the key to them being able to use their gaping reflex to open wide and get a better latch.
To make this happen, you’ll need to slide your baby’s body further back, either toward your hip or down so they are below your breast/chest.
This shift sets the stage for Phase 2.
What a Good Starting Position Looks Like
This is the same week-old baby in two variations of a cross-cradle hold. In the first picture, the baby is positioned diagonally across his mother’s belly. In the traditional cross-cradle hold, the baby is horizontal. Both work, as long as they start with the nose pointing at the nipple.
Diagonal Cross Cradle Hold: The arms are not up and around the body, but the belly is snuggled to the belly and the chin close to the breast with the nipple near the nose.
Diagonal Cross Cradle Hold: The arms are not up and around the body, but the belly is snuggled to the belly and the chin close to the breast with the nipple near the nose.
Traditional cross cradle hold. The arms are still down, but the baby is belly to belly, chin to chest, and the nipple is near the nose. Again, the baby's head is free to move.
Phase Two: Attaching (Latching On)
Now that your baby is set up in the right position, it’s time for them to latch on — and this part is largely their job.
Your job is to wait, as long as your baby stays calm, and let their natural reflexes do the work.
That sounds simple, but it’s harder than it seems. You’ll feel the urge to “help” — especially if you were taught to stroke your nipple down your baby’s lips and quickly pop it into their mouth. Instead, your role here is to pause, keep your baby calm, and give their reflexes a chance to work.
Trust your baby. They are more capable than you think.
The Latching Reflexes Your Baby May Use
Rooting: turning their head side to side
Seeking: extending their head up and gently back
Gaping: opening wide after their chin has made contact with your breast
Attaching: coming forward to create a seal and start sucking
If you’re wondering why your baby’s reflexes don’t always seem to show up in the “right” order, I cover that in more detail here: Why Reflexes Make Latching Easier.
What the Reflexes Look Like in Action
Rooting reflex: The touch of the nipple on the cheek cues your baby to turn their head so their mouth lines up with the nipple.
Seeking reflex: As they move toward the nipple, they extend their head slightly back, bringing the chin into contact.
Rooting reflex: The touch of the nipple on the cheek cues your baby to turn their head so their mouth lines up with the nipple.
Seeking reflex: As they move toward the nipple, they extend their head slightly back, bringing the chin into contact.
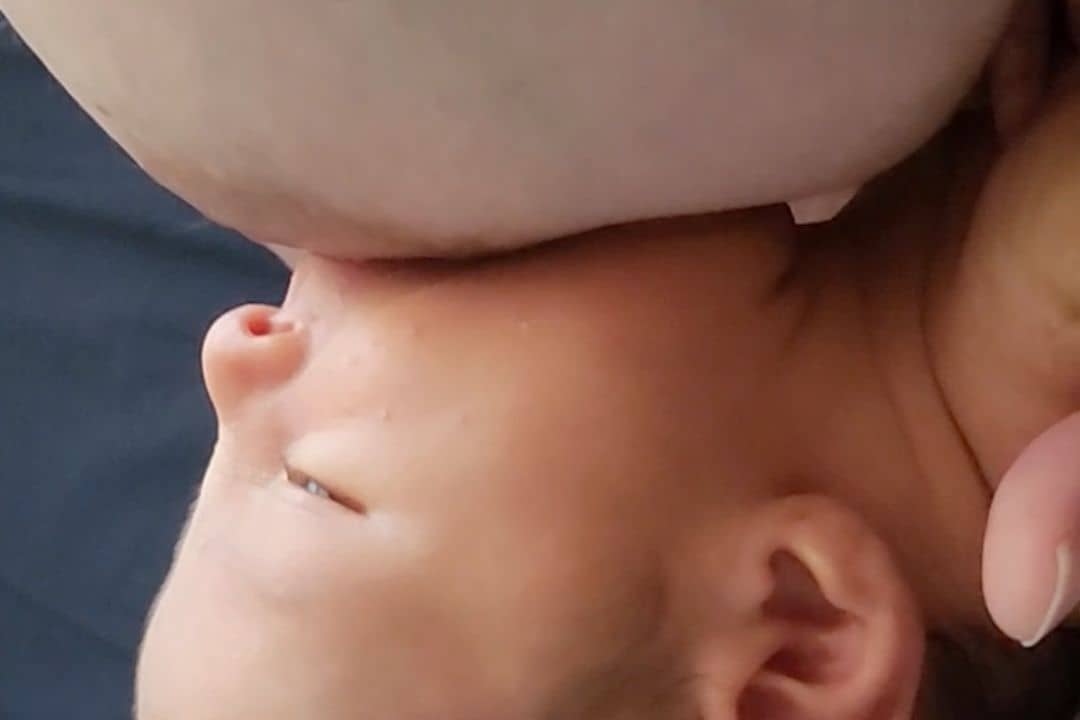
Gaping reflex: Chin contact triggers a wide-open mouth — the key moment that sets the stage for a deep, pain-free latch.
Once the baby's mouth is open wide, the nipple will touch the top lip, and this will cue the attaching reflex.
They come forward until they makes a seal with their lips and tongue to make a vacuum for feeding.
Attaching reflex: Once the mouth is wide, the nipple brushes the top lip, cueing them to come forward.
They come forward until they makes a seal with their lips and tongue to make a vacuum for feeding.
Comfortable feeding: Once latched and sucking, it’s time to re-position so everyone is comfortable.
Your Role in the Latching Process
You have three real jobs during this step:
Keep your baby positioned so their reflexes can work. Make sure their mouth can open wide before your nipple cues a different reflex.
Help them attach, if necessary. Bring them forward at the moment their mouth is open widest. If latching has been painful for you, timing is usually the piece that needs the most support.
Switch to Plan B if needed. If your baby gets upset, use your “in case of emergency” latch (more on that below).
The good news: once you see the timing, and practice it for a few days, it doesn’t stay this precise. As your baby gets more practice using their reflexes, everything becomes easier.
Before long, you’ll just get them in the general vicinity of your nipple, and they’ll comfortably do the rest.
That’s when you officially have a “zipcode baby.”
Helping with Attaching
When and how you bring your baby forward to help with attachment is the single biggest skill that you have to master.
And it's really just about timing.
You have to be able to see when your baby's mouth is open at their widest part, and make sure your nipple goes into their mouth right when this is happening.
This is the entire reason why I recommend you using the cross cradle position and sitting up - so you can see when it happens and use your hand to respond right away if you need to.
Especially if you have a baby that opens and closes quickly or gets upset easily, and you have a short window before it's off to Latching Plan B.
And helping with attaching is truly just as simple as using the hand behind their back to snuggle them in closer at the right moment.
It's not a big movement...more like a cue to tell your baby "now! this is our chance".
What the Latching Looks Like When Everything's Working
It truly can be this fluid, easy and peaceful when it's working well.
So if you’re second-guessing yourself, you’re not alone — this isn’t a first-time parent moment. This is her second rodeo, and she relied on a very patient baby and my support through the process.
A lot of the time, though, things don’t go smoothly — and that’s OK. This entire blog exists to help you navigate those tougher moments.
My goal in this post is to help you understand what’s happening — so you can get the idea first, then figure out how to make it work for *you*.
Sometimes it helps to actually see the process in action with a real baby, or to have me walk you through it step by step in a video. You’ll find both inside my Expanded Access Pass.
Phase Three: Getting Comfortable
Once your baby is latched and feeding, you’re ready for the most important step — getting your own body comfortable.
This is the moment to let your shoulders, back, and neck relax. And since you won’t be stuck holding your breast in place the entire feed anymore, you’ll actually be able to eat, sip some water, or just breathe, too.
Shift Your Hold
After your baby has latched on and you’ve given them a few minutes to make sure everything is stable, it’s time to shift how you’re holding them. Swap the arm you’re using so that your trunk and biceps can take over the job of supporting your baby.
This small change lets you relax your hand and takes pressure off your wrist and shoulder.
Lean back to take tension out of your back and help your baby settle into a more supported position.
Use pillows to support your arms, neck, or shoulders.
Use your free hand (!!) to stroke your baby, drink some water, or feed yourself.
Once your body is supported, let your shoulders drop and breathe. A lot of what makes feeding easier isn’t about your technique — it’s about being able to stay comfortable for however long your baby needs.
Your baby just did a big job figuring out how to latch. You did too. Now’s the time to stroke them, smell them, and just settle in together — this is what sets the stage for truly enjoying feeding time.
Here’s what it looks like:
When Latching Doesn't Go As Planned
This whole blog is about real babies, real bodies, and solving real problems. And here’s the truth: there are plenty of ways latching can be hard.
Some babies give you one shot at opening wide.
Some babies go from calm to screaming in seconds.
Some anatomies — yours or your baby's — are harder than others.
And some babies struggle with latching at all, even when you’re doing everything else right.
None of this means that enjoying feeding is off the table for you.
It just means you may need to make a few adjustments to find what works best for you and your baby before it feels good.
And that brings us back to the Plan B latch I mentioned earlier.
The Emergency (Plan B) Latch
I’ve said this before, but it’s worth repeating: there’s no one “right” way to latch a baby. Humans are built to feed in many different positions — sitting upright, lying back, even stretched out on our sides.
And babies (amazingly) have reflexes that help them find the nipple and attach on their own in any of those positions.
You’ll naturally use different positions at different times. At home, in bed, or even on a park bench — comfort looks different in each place.
And just like positions, you may need different latching approaches depending on the moment.
Emergency Latch (Plan B): The quick, get-it-done option. When everyone’s in meltdown mode — baby crying, milk leaking, stress running high — you shape your breast, aim your nipple, and guide your baby on however you can. It solves the immediate need so you can both breathe.
Reflexive Latch: The slower, learning approach. When things are calmer, you give your baby space to use their feeding reflexes, build muscle coordination, and practice latching more deeply on their own. Over time, this makes feeds smoother and more comfortable.
You’re not choosing between them — you’re learning to use both. One helps you get through the hard moments. The other helps you and your baby build skills for the long run.
If your baby gets upset while you’re practicing a latch, go back to your emergency latch. Learning can’t happen from a place of stress — for either you or your baby. Going back doesn’t mean you’re doing it wrong.
It means you’re using the right approach for that moment, and you can always try again once everyone is calm.
Practice Without Perfection
If you’re working on getting a deep latch and it’s not going the way you hoped, don’t panic. Latching is a skill. And like any new skill, it’s something you build over time. The learning happens in the practice, not in the perfection.
But there’s a time and place for everything. If your baby is upset and you’re stressed, that’s not the moment to troubleshoot.
That’s the time to do what works — bottle, nipple shield, quick latch — whatever keeps everyone calm. There’s no shame in that.
Once your baby is settled again, that’s your window. That’s when you can circle back, think through what worked (and what didn’t), and try again.
Every baby has a learning curve. Some need a few tries, some need a few dozen. That’s not failure. That’s learning.
If feeding has felt like a struggle, please hear this: it doesn’t have to stay that way.
You’re not doing anything wrong.
You and your baby are simply learning together. Some days will feel easier than others, and that’s normal.
With each attempt — whether it works or not — you’re building the awareness and skills that will carry you both forward.
You don’t need to memorize a bunch of rules or do everything “by the book.” You just need a starting point that works with your baby’s reflexes and your body’s reality. And now? You have tools. You have options.
🔒 Expanded Access resources go deeper to help you solve your latching and feeding problems.Click here to learn more about what's inside.
Frequently Asked Latching Questions
Some babies start with a great latch but can’t quite hold it. This often happens if they lose suction, get tired, or struggle to stay aligned. It’s frustrating but very common, and usually points to a shallow latch pattern that needs troubleshooting.
If your baby’s mouth isn’t opening wide, their latch can’t get deep—no matter how well you’re positioned. This can happen if their reflexes aren’t fully engaged or if timing is off. Supporting chin contact and waiting for a big gape often helps.
Even with a deep latch, some parents still experience pain. Common culprits include tongue tie, oral tension, or anatomy differences that affect suction. These issues can be addressed once identified.
If feeding feels confusing, inconsistent, or harder than it should, you don’t have to navigate next steps on your own.
Expanded Access offers deeper answers, real examples with real babies, and ongoing support to help you make sense of latching challenges — with answers available when you need them.